
Translations
The Translations page is only visible for multilingual projects with additional languages configured. Translations apply agent-wide – to both voice and chat channels.
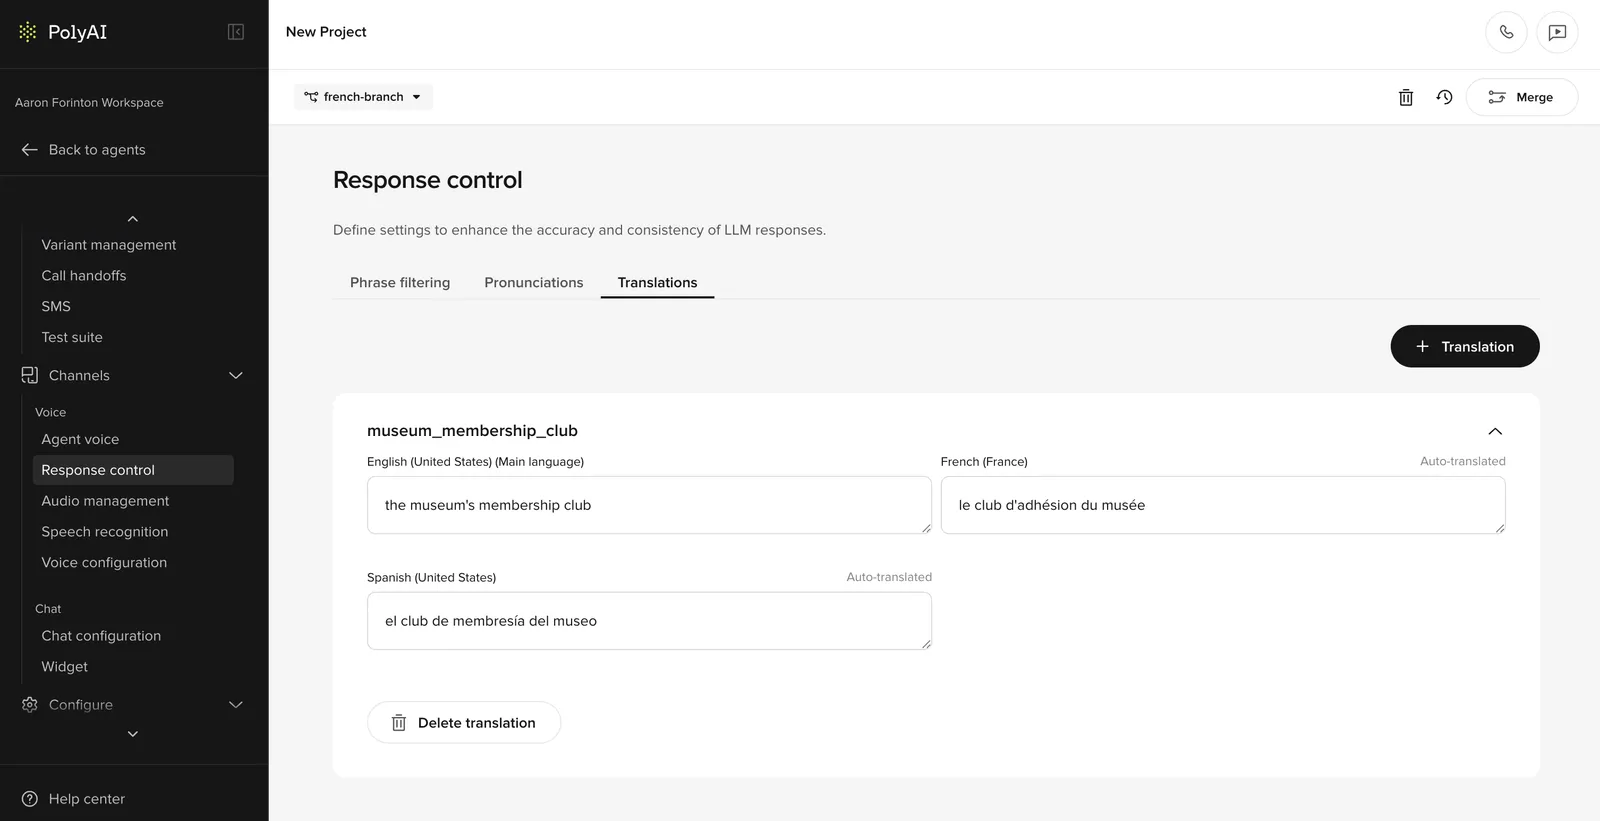
Agent Studio can build agents in English that respond to callers in other languages – the LLM handles most translation automatically. However, some content can’t be auto-translated well: hard-coded utterances in functions, delay control responses, and phrases where cultural nuances matter. The Translations page gives you a central place to manage these overrides.
You create translation cards that store language-specific versions of content, then reference them throughout your project using a translation key.
You don’t need to add every utterance to the Translations page. Only use it for content where the auto-translation isn’t good enough. If you’re satisfied with the LLM’s translations, you don’t need this page at all.
When to use translations
Translations are useful when:
- Auto-translated phrasing sounds unnatural – for example, “Please hold” auto-translates correctly to British English but “Please bear with me” sounds more natural
- Concepts don’t exist in the target language – for example, “Spell the name” has no direct equivalent in Mandarin or Japanese, so a direct translation sounds unnatural
- Domain-specific terms need precise translations that the LLM gets wrong
- Cultural nuances require different phrasing – extra politeness levels in Japanese, gender-based formality in Hindi or Polish
- Hard-coded utterances in functions need language-specific versions
- Greeting or disclaimer messages need manual translation
How it works
- Create a translation card with the content you want translated
- The card auto-translates to all configured languages on save
- Manually edit any translation that needs improvement – these are marked as “Manually Translated”
- Reference the card in your project using its Translation Key
Creating a translation card
- Go to Behavior > Language > Translations
- Click Add translation
- Enter the content in your main language
- Set a Translation Key – this is how you’ll reference the card elsewhere
- Save – auto-translations are generated for all configured languages
Manually overriding translations
After a card is created, each language shows a status:
- Auto-Translated – generated automatically on save
- Manually Translated – you’ve edited the translation for this language
To override a translation, click into the language field and edit the text directly.
Using translations in your project
In prompts and content
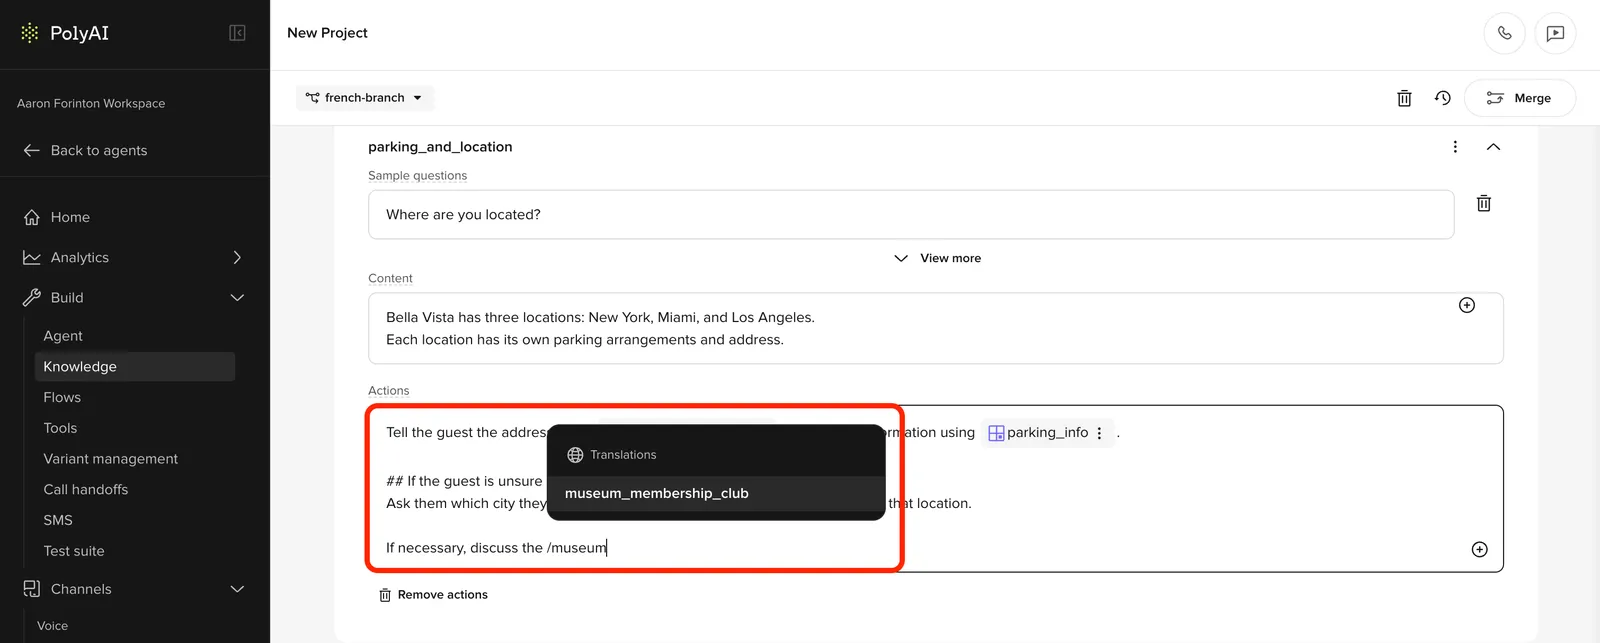
Insert a translation using the action menu (similar to inserting a variant) in:
- Greeting and disclaimer messages
- Behavior rules (style guides)
- Prompts in FAQs
- Delay control responses
- SMS templates
In functions
For hard-coded utterances in functions, access translations using the conv.translations object:
For translation keys with special characters:
Language-specific style guides
Translation cards handle specific phrases, but broader behavioral differences across languages are best managed in Behavior rules. Add language-specific style guides to make the agent behave more naturally in each language:
- Japanese – extra politeness and honorific language
- Hindi and Polish – gender-based formality
- German – formal “Sie” vs informal “du” based on context
- Spanish – regional variation between Latin America and Spain
Use <language:xx> tags in behavior rules to scope style guides to specific languages.
Best practices
- Only translate what needs overriding. If auto-translation works, don’t add it to the Translations page.
- Use descriptive translation keys. Keys like
tn_hold_messageare easier to manage thantn_1. - Test with native speakers before going live – auto-translations may be technically correct but sound unnatural.
- Keep the main language content up to date. When you edit the main language text on a card, auto-translations regenerate for languages that haven’t been manually overridden.